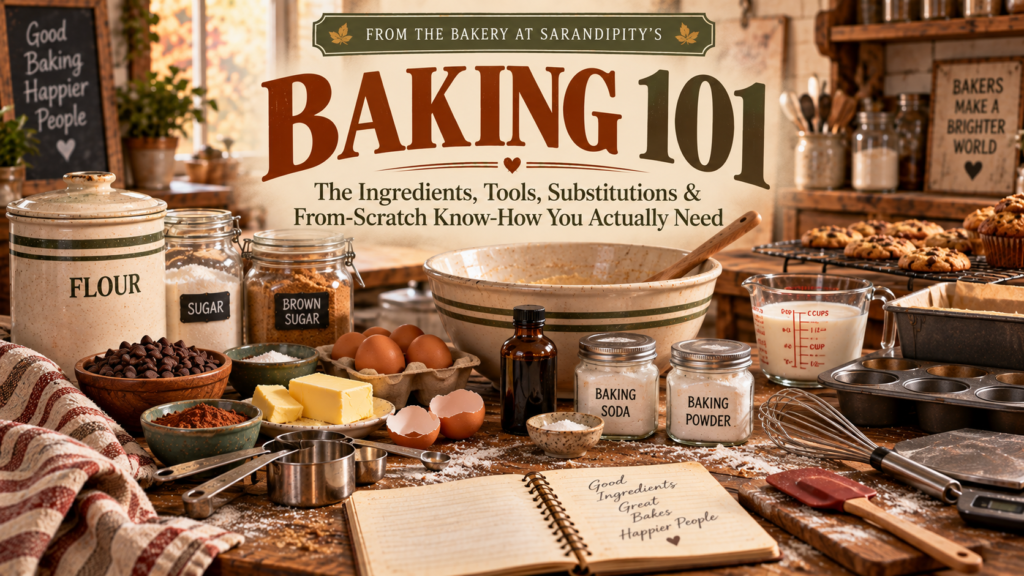
You do not need a kitchen full of expensive equipment, thirty-seven specialty ingredients or professional pastry-school training to bake something damn good.
You need a few reliable ingredients, some basic equipment and enough understanding of what you’re doing to know why your cookies turned into pancakes—or what to do when you’ve already started a recipe and discover you’re out of buttermilk.
That’s what this guide is for.
Consider this Baking 101 for real kitchens.
We’re covering what to keep in the pantry, which baking tools are actually worth owning, how to measure ingredients properly, what common baking ingredients do, which substitutions work, what you can make instead of buying and some of the mistakes that can turn a perfectly innocent batch of muffins into twelve tiny hockey pucks.
And here’s something worth knowing about the way I cook around here:
I’m not anti-shortcut. I’m pro-knowing-how-to-do-it-yourself.
Sometimes I’m making the pie crust.
Sometimes I’m buying the pie crust.
Sometimes I’m making homemade biscuits with cold butter cut into the flour.
Sometimes I’m whacking a refrigerated biscuit tube against the counter because dinner needed to happen twenty minutes ago.
Knowing how to make something from scratch doesn’t mean you have to make it from scratch every damn time.
It means the choice is yours.
So let’s bake.
What Ingredients Should Every Baker Keep on Hand?
You don’t need to stock your pantry like you’re opening a commercial bakery.
With a relatively small collection of staples, you can make cookies, cakes, brownies, muffins, quick breads, biscuits, cobblers, crisps, and plenty of other things without making an emergency grocery run.
All-Purpose Flour
If you’re only keeping one type of flour in the house, make it all-purpose flour.
It’s exactly what the name suggests: useful for a little bit of everything.
Cookies, brownies, muffins, quick breads, pancakes, biscuits, cakes and plenty of other recipes can be made with it.
Store flour in an airtight container somewhere cool and dry.
And please don’t attack the flour bag with your measuring cup.
We’ll talk about that shortly.
Granulated Sugar
Regular white granulated sugar does more than make things sweet.
Sugar affects browning, moisture, texture and structure too.
It’s one of those basic ingredients you’ll use constantly, so I keep plenty around.
Brown Sugar
Brown sugar brings sweetness along with moisture and molasses flavor.
That’s why it shows up so often in chewy cookies, blondies, quick breads, crumb toppings and other recipes where we want a softer texture and deeper flavor.
You’ll generally encounter light brown sugar and dark brown sugar.
Dark brown contains more molasses and has a stronger flavor. For plenty of everyday recipes, you can use whichever one you happen to have unless the distinction is important to the finished result.
And if you have neither?
We can make it.
Powdered Sugar
Also called confectioners’ sugar, powdered sugar is finely ground sugar generally containing a little starch to help prevent clumping.
You’ll use it for frostings, glazes, dusting desserts and plenty of other finishing touches.
Butter
Butter provides fat, flavor, tenderness and structure.
And the form of butter matters.
Cold butter, softened butter and melted butter are not automatically interchangeable.
Cold butter helps create flaky layers in things like biscuits and pie crust.
Softened butter can trap air when it’s creamed with sugar.
Melted butter behaves differently again and can produce denser or chewier textures depending on the recipe.
When a recipe tells you what temperature the butter should be, pay attention.
It isn’t just being bossy.
Eggs
Eggs are little baking multitaskers.
Depending on the recipe, they can contribute structure, moisture, richness, binding, emulsification and leavening.
That’s also why replacing an egg isn’t always as simple as saying, “Use ¼ cup of this instead.”
The best substitute depends on what the egg was supposed to accomplish.
Milk
Regular milk handles a lot of everyday baking.
Whole milk generally gives you more richness, but lower-fat milk can work in many recipes too.
Heavy Cream
You don’t need heavy cream for basic baking, but it’s useful if you bake regularly.
It’s the starting point for homemade whipped cream and shows up in ganache, caramel, fillings, frostings and richer desserts.
Vanilla Extract
Vanilla makes an enormous difference for such a small ingredient.
It doesn’t necessarily make everything taste strongly of vanilla. It rounds out and enhances other flavors.
Use real vanilla extract when your budget allows.
Baking Soda
Baking soda is sodium bicarbonate, and it needs an acidic ingredient to produce the chemical reaction many recipes depend on for lift.
That acid might come from buttermilk, yogurt, molasses, brown sugar, lemon juice or another ingredient.
Baking Powder
Baking powder contains baking soda plus acidifying ingredients, so it doesn’t depend on the recipe providing the same external acid source.
The important part:
Baking powder and baking soda are not interchangeable in equal amounts.
If the recipe asks for one, don’t randomly use the other because they’re both white powders living near each other in the cabinet.
Cornstarch
Cornstarch is useful for thickening fruit fillings, puddings and sauces and can also affect the tenderness and texture of some baked goods.
It’s inexpensive and worth keeping around.
Salt
Yes, your dessert needs salt.
Salt balances sweetness and helps other flavors stand out.
Chocolate tastes more chocolatey. Caramel gets more interesting. Vanilla doesn’t taste as flat.
You generally won’t taste the small amount of salt in a properly balanced recipe.
You’ll notice what’s missing when it isn’t there.
Cocoa Powder
If chocolate regularly happens in your kitchen, keep cocoa powder around.
One important warning: natural cocoa powder and Dutch-process cocoa aren’t always interchangeable, particularly in recipes where the cocoa’s acidity interacts with the leavening.
Use what the recipe specifies when it matters.
Chocolate Chips
Necessary for chocolate chip cookies.
Also necessary for standing in the pantry eating six of them while deciding whether you’re actually going to make the cookies.
I consider both valid uses.
What Do Baking Ingredients Actually Do?
This is where baking gets considerably easier.
You don’t need to become a food scientist, but understanding the basic jobs ingredients perform makes recipes feel less like mysterious sets of rules.
Think of it roughly like this:
Flour provides structure.
Fat adds tenderness, richness, and flavor.
Sugar sweetens but also affects moisture, spread, browning, and texture.
Eggs bind and provide structure, moisture, and richness.
Liquid hydrates dry ingredients and helps batters and doughs come together.
Leaveners create lift.
Salt balances and strengthens flavor.
Once you understand that, substitutions start making more sense.
You’re not simply asking:
“What can replace this ingredient?”
You’re asking:
“What job was this ingredient doing, and what else can do that job?”
That is a much better question.
How to Measure Baking Ingredients Properly
Cooking gives us quite a bit of room for improvisation.
Baking is less forgiving.
You don’t need laboratory precision to make brownies, but measuring properly will eliminate a surprising number of problems.
WORTH BUYING: If you’re ready to start weighing your baking ingredients, you don’t need an expensive scale. The Escali Primo Digital Food Scale is simple, affordable and does the job without taking over the counter.
The Best Option: Weigh Your Ingredients
If you bake frequently, a small digital kitchen scale is one of the least glamorous and most useful pieces of equipment you can buy.
Weight is more consistent than measuring by volume.
A cup of flour can contain considerably different amounts depending on how it was filled.
A specified weight doesn’t have that problem.
If a recipe provides grams, use them when you can.
If You’re Using Measuring Cups, Don’t Scoop Flour
Here’s the problem.
You push a measuring cup down into the flour container.
The flour packs into it.
You level the top.
Congratulations. You may now have significantly more flour than the recipe intended.
Instead:
Fluff the flour.
Spoon it loosely into your measuring cup.
Level the top with a straight edge.
No packing.
Brown Sugar Is Different
If a recipe calls for packed brown sugar, pack it.
Yes, baking likes making rules just to keep everybody alert.
Measure Liquids at Eye Level
Use a liquid measuring cup on a flat surface and check the measurement at eye level rather than holding it in the air and guessing.
Small Measurements Matter
A little extra vanilla probably isn’t going to destroy your cookies.
A random extra teaspoon of baking soda?
Different story.
Measure your leaveners.
Baking Equipment You Actually Need
Walk through the baking aisle of a kitchen store and you’d think people were incapable of making cupcakes before the invention of seventeen specialized gadgets.
You don’t need most of them.
The Basics
If you’re building a baking kitchen from scratch, I’d start with:
- dry measuring cups
- liquid measuring cup
- measuring spoons
- several mixing bowls
- whisk
- wooden spoon
- silicone spatula
- sturdy baking sheets
- 8×8-inch baking pan
- 9×13-inch baking pan
- 9×5-inch loaf pan
- 12-cup muffin pan
- parchment paper
With that setup, you can make an enormous range of recipes.
A Digital Kitchen Scale
I consider this one of the first upgrades worth making.
It’s useful for precision, but it’s also convenient.
Put your bowl on the scale, zero it out and measure ingredients directly into it.
Fewer measuring cups to wash.
I’m listening.
WORTH BUYING: If you’re ready to start weighing your baking ingredients, you don’t need an expensive scale. The Escali Primo Digital Food Scale is simple, affordable and does the job without taking over the counter.
An Oven Thermometer
Your oven’s display can say 350°F with remarkable confidence while the inside of the oven is doing something entirely different.
If your baked goods consistently cook too quickly, too slowly or unevenly, an inexpensive oven thermometer can help you figure out whether the recipe is the problem—or your oven is lying to you.
Cooling Racks
Useful for allowing air to circulate around cookies, cakes and breads as they cool.
Worth owning eventually, but you can survive your first batch of cookies without one.
Hand Mixer
Useful for creaming butter and sugar, whipping cream, making frosting and handling plenty of other jobs.
You don’t need one for every recipe.
Stand Mixer
Do I object to stand mixers?
Absolutely not.
Do you need one before you’re allowed to call yourself a baker?
Also absolutely not.
They’re fantastic for frequent baking, bread doughs, larger batches and recipes requiring extended mixing.
But a $400 appliance does not make the cookies taste $400 better.
Start with what you have.
WHAT I USE: I have both a KitchenAid hand mixer and a KitchenAid stand mixer, and I use both. For ordinary cakes, frostings, whipped cream, mashed potatoes and everyday mixing, the KitchenAid 5-Speed Ultra Power Hand Mixer is usually all the machine you need. It’s considerably easier to pull out, use and put away than a stand mixer.
If you only bake occasionally or you’re short on counter space, I’d buy the hand mixer first.
Do you need a stand mixer to bake?
Nope.
Do I love mine anyway?
Absolutely.
I own both a KitchenAid stand mixer and hand mixer, and they serve different purposes in my kitchen. My KitchenAid Artisan 5-Quart Stand Mixer has been well worth the money because I cook and bake frequently. It’s especially useful when I’m making bread dough, working with heavier mixtures, making larger batches or doing something that needs several minutes of mixing while I’d rather have both hands free.
But here’s the part appliance ads tend to leave out: KitchenAid stand mixers are heavy and take up a decent amount of space.
If you only bake occasionally, have limited storage or mostly make cakes, cookies and frostings, you may get far more practical use from a $50-ish hand mixer.
If you bake bread regularly or bake often enough that the mixer will live on your counter and actually get used, that’s where I think a good stand mixer starts earning its keep.
WHAT I USE: KitchenAid Artisan Series 5-Quart Tilt-Head Stand Mixer
I also own a cheaper stand mixer, so I’m putting together a full comparison of when KitchenAid is worth the extra money—and when a less expensive alternative may make more sense.
Baking Pans: Why Size Matters
If a recipe calls for an 8×8-inch pan and you dump the batter into a 9×13 because they’re both rectangles, you have changed the recipe.
A larger pan spreads the batter thinner.
Thinner batter generally cooks faster.
A smaller pan makes it deeper.
Deeper batter generally needs more time.
Pan material matters too. Dark metal, light metal, glass and ceramic can behave differently in the oven.
That doesn’t mean you can never substitute pans.
It means you need to understand that changing the pan may require changing the baking time.
When you’re learning, use the recommended size whenever possible.
SARA’S PICK: If you’re starting from scratch, I’d buy a baking-sheet set with multiple sizes instead of several identical pans. The Nordic Ware Naturals 3-Piece Baking Sheet Set gives you different sizes for cookies, small batches, roasting, reheating and everything in between. I also prefer the simple uncoated aluminum construction over paying extra for another fancy coating that’s eventually going to look like it’s been through a war.
THE BAKERY STARTER KIT
Starting a baking kitchen from scratch? Don’t buy every gadget Amazon can throw at you.
I’d start with:
Digital kitchen scale — Escali Primo Digital Kitchen Scale
Baking sheets — Nordic Ware Naturals 3-Piece Baking Sheet Set
Hand mixer — KitchenAid 5-Speed Ultra Power Hand Mixer
Mixing bowls — OXO Good Grips 3-Piece Mixing Bowl Set
Liquid measuring cup — Pyrex 2-Cup Glass Measuring Cup
Silicone spatula — OXO Good Grips Silicone Spatula
Whisk — OXO Good Grips Balloon Whisk
Oven thermometer — Taylor Large Dial Oven Thermometer
Parchment paper — Reynolds Kitchens Parchment Paper
Then add pans and specialty equipment as the recipes you actually make require them.
You do not need to build somebody else’s dream kitchen. Build the kitchen you actually cook in.
12 Baking Rules Worth Learning Early
I don’t believe baking needs to be fussy.
I do believe a few habits save you from unnecessary disappointment.
1. Read the Whole Recipe Before Starting
Yes.
All of it.
You want to discover that the dough needs to chill for two hours before you promise cookies in twenty minutes.
2. Preheat Your Oven
Put baked goods into an oven that’s already at the intended temperature unless the recipe specifically tells you otherwise.
3. Check Your Ingredients Before You Start
Nothing builds character quite like discovering you’re out of eggs after you’ve melted the butter.
Take thirty seconds and make sure you actually have everything.
4. Pay Attention to Ingredient Temperature
If the recipe specifies cold butter, softened butter or room-temperature eggs, there’s probably a reason.
5. Don’t Overmix
Once flour joins a muffin, cake or quick-bread batter, you often want to mix only until the ingredients are combined.
Excessive mixing can develop more gluten and leave tender baked goods tougher or denser.
6. Don’t Abuse Cookie Dough
Same idea.
Mix it until it needs to be mixed.
Then stop bothering it.
7. Give Things Room
Cookies need space to spread.
Biscuits sometimes need room to rise.
Overcrowding can affect how things bake.
8. Stop Opening the Oven
I know.
You want to look.
Use the window.
Opening the oven repeatedly dumps heat.
9. Start Checking at the Beginning of the Time Range
If a recipe says 22–27 minutes, start checking around 22.
Every oven is different.
10. Learn What “Done” Looks Like
The timer is a guide.
Look for the visual cues in the recipe: browned edges, set centers, springy tops, clean toothpicks, bubbling filling or whatever applies.
11. Let Things Cool
Sometimes cooling is part of the process.
Brownies set.
Bars firm.
Breads become easier to slice.
Cheesecakes become cheesecakes instead of warm pudding disasters.
12. Make Notes
If something took 34 minutes in your oven when the recipe said 30, write it down.
If you added pecans and loved it, write that down too.
Recipes become considerably more useful when they accumulate evidence of your actual kitchen.
What Can I Use If I’m Missing an Ingredient?
Welcome to one of my favorite kitchen skills:
figuring out how not to make another trip to the store.
Before substituting anything, remember our earlier rule.
Ask what the missing ingredient was supposed to do.
Some substitutions are extremely dependable.
Others work only in certain recipes.
Buttermilk Substitute
For 1 cup of buttermilk, add:
1 tablespoon lemon juice or white vinegar
to a measuring cup, then add enough milk to reach:
1 cup total
Let it sit for about 5–10 minutes before using.
This isn’t identical to cultured buttermilk, but it works as an acidic milk substitute in many everyday baking applications.
Brown Sugar Substitute
No brown sugar?
Make it.
For approximately 1 cup light brown sugar, combine:
1 cup granulated sugar
1 tablespoon molasses
For a darker version, increase the molasses.
You don’t even necessarily need to pre-mix a giant batch. If the ingredients are getting thoroughly combined in your recipe anyway, you can often incorporate the sugar and molasses there.
Self-Rising Flour Substitute
For each cup needed, combine:
1 cup all-purpose flour
1½ teaspoons baking powder
¼ teaspoon salt
Cake Flour Substitute
For each cup of cake flour:
Measure 1 cup all-purpose flour.
Remove 2 tablespoons flour.
Replace those with 2 tablespoons cornstarch.
Whisk or sift thoroughly.
It isn’t commercially milled cake flour, but it can work as a useful home substitute.
Powdered Sugar Substitute
If you’re desperate, process granulated sugar in a high-powered blender or spice grinder until it becomes very fine and powdery.
For especially smooth frostings and other texture-sensitive recipes, regular commercial powdered sugar can still produce a more predictable result.
No Egg?
This is where blanket substitution charts can get people into trouble.
An egg can provide moisture, binding, structure, emulsification or lift.
For some muffins, brownies and quick breads, ¼ cup unsweetened applesauce can work in place of one egg.
Mashed banana works in some applications.
A flax egg can work in others.
But none of those ingredients behaves exactly like an egg in every recipe.
If eggs are structurally important to what you’re making, use a substitution designed and tested for that particular type of recipe.
Make Your Own Baking Spice Blends
Buying a premixed spice blend is convenient.
Making one takes about thirty seconds.
Homemade Pumpkin Pie Spice
Combine:
4 teaspoons ground cinnamon
2 teaspoons ground ginger
1 teaspoon ground nutmeg
½ teaspoon ground cloves
Store it in a small airtight container.
Homemade Apple Pie Spice
Combine:
4 teaspoons ground cinnamon
1 teaspoon ground nutmeg
½ teaspoon ground ginger
½ teaspoon ground allspice
And here’s the advantage of mixing your own:
Don’t like cloves?
Use less.
Love cinnamon?
Add more.
It’s your kitchen.
Make It Instead of Buying It
This is the part of Baking 101 I care about most.
Convenience ingredients are useful.
I use them.
You’ll see them in some of my recipes because sometimes the goal is simply get something good into the oven without turning it into a three-hour project.
But I don’t want you to think the boxed, canned or refrigerated version is the only version.
I want you to know what’s inside it and how to make the equivalent yourself when it makes sense.
Boxed Cake Mix
Cake mix isn’t magic powder.
At its most basic, it’s a carefully formulated combination of flour, sugar, leavening, salt and other dry ingredients, with commercial mixes sometimes containing additional ingredients for texture, flavor and shelf stability.
Can we make homemade cake mix?
Absolutely.
But I don’t recommend blindly replacing a commercial box in every shortcut recipe with the same generic homemade mixture.
Different recipes rely on different quantities and formulations.
So when I give you a recipe using boxed mix, I’ll either provide or point you toward a from-scratch version designed for that recipe whenever practical.
That’s much more useful than pretending one internet substitution works everywhere.
Canned Pie Filling
This is one I’m particularly happy to replace.
Fruit + sugar + spices + thickener + a little acidity can become homemade pie filling without much trouble.
You control how sweet it is.
You control the spice.
You choose the fruit.
And when apple season arrives and you’ve somehow acquired twenty pounds of apples, you’ll know what to do with them.
Refrigerated Biscuit Dough
The tube is convenient.
Use it when convenience wins.
But homemade biscuits require a relatively short ingredient list—typically flour, leavening, salt, fat and dairy.
Learning basic biscuit dough opens up far more than biscuits, too.
Refrigerated Pie Crust
Store-bought crust has rescued many holiday dinners.
I’m not going to insult it.
But homemade pie crust is a skill worth learning because the ingredients are extremely basic.
Flour.
Fat.
Salt.
Cold water.
The technique matters more than the ingredient list.
We’ll tackle that separately because pie crust deserves more explanation than “mix these four things and hope.”
Whipped Topping
If a recipe calls for whipped topping and you’d rather skip the tub, homemade whipped cream is wonderfully simple.
At its most basic:
cold heavy cream + sugar + vanilla
Whip until it reaches the appropriate consistency.
That’s it.
Caramel Sauce
Store-bought caramel works.
Homemade caramel is also one of those kitchen skills that feels suspiciously impressive once you learn it.
Sugar, butter, cream and salt can get you there.
Hot sugar does demand respect, though, so caramel deserves its own proper tutorial rather than three reckless sentences tucked inside another post.
Baking Mix
Commercial all-purpose baking mixes are another convenience you can recreate at home.
A homemade version generally combines flour, leavening, salt and fat in proportions designed to be ready for biscuits, pancakes and similar recipes.
This is another one we’ll build as a dedicated Bakery recipe so you have a reliable jar of homemade mix rather than guessing every time.
So, Should You Stop Buying Baking Shortcuts?
No.
That isn’t the point.
If buying refrigerated dough means you make breakfast with your kids on Saturday instead of deciding it’s too much work, buy the dough.
If boxed cake mix gets cupcakes onto the table for a birthday during a completely insane week, use the box.
If you’ve got fresh apples, an open afternoon and feel like making everything yourself?
Hell yes. Let’s make the filling too.
From-scratch cooking isn’t about proving anything.
It’s about having skills and options.
I would much rather teach you:
“Here’s the quick way, and here’s how to make it yourself.”
Then you decide which version fits your life that day.
How to Troubleshoot Common Baking Problems
Something went sideways.
Welcome to baking.
Before throwing the recipe away, figure out what happened.
Why Are My Cookies Flat?
Common possibilities include:
- butter was too warm
- dough needed chilling
- too little flour
- incorrect leavening
- baking sheet was warm before dough went onto it
One flat batch doesn’t necessarily mean the recipe is terrible.
Why Are My Muffins or Quick Breads Tough?
Overmixing is a common culprit.
Too much flour can also produce dry or dense results.
Measure carefully and stop stirring once the batter is combined.
Why Is My Cake Dry?
Possibilities include:
- too much flour
- overbaking
- incorrect pan size
- oven running hot
- reducing sugar or fat without accounting for what those ingredients contribute
Remember: ingredients don’t have only one job.
Why Did the Middle Sink?
Possible causes include underbaking, too much leavener, incorrect ratios or disturbing certain baked goods before their structure has set.
Why Did My Brownies Turn Into Cake?
Could be the recipe.
Could also be too much flour, too much leavening or overbaking depending on what you made.
If you want fudgy brownies, use a recipe designed to be fudgy rather than trying to force a cakey brownie formula into submission.
Why Did Everything Burn on the Bottom?
Check:
- oven temperature
- rack position
- pan material
- baking time
And get that oven thermometer if this keeps happening.
Your oven may be framing you.
How to Become a Better Baker Without Making Yourself Crazy
Bake.
That’s really it.
You can read about baking science for six months, but eventually somebody has to put flour in a bowl.
Start with forgiving recipes.
Make muffins.
Bake cookies.
Make brownies.
Try a quick bread.
Learn what properly softened butter feels like.
Notice what muffin batter looks like before it’s overmixed.
Learn how your oven behaves.
Burn something.
We all do.
Make it again.
And don’t feel like you have to graduate from “easy” recipes.
Easy food isn’t inferior food.
Sometimes the simplest recipes are the ones your family asks you to make again.
That’s a considerably better measure of success than whether something required fourteen bowls.